Using a Raspberry Pi for Steam Link: A Comprehensive Guide
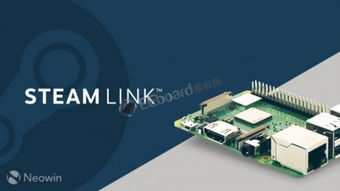
Are you looking to enhance your gaming experience by streaming games from your PC to your TV? If so, using a Raspberry Pi for Steam Link might be the perfect solution for you. In this detailed guide, I’ll walk you through the process of setting up a Raspberry Pi as a Steam Link device, covering everything from hardware requirements to software installation and configuration.
Hardware Requirements

Before you begin, you’ll need to gather the following hardware components:
| Component | Description |
|---|---|
| Raspberry Pi 3 or 4 | The Raspberry Pi 3 or 4 is the recommended hardware for running Steam Link. The Raspberry Pi 4 offers better performance and support for 4K streaming. |
| MicroSD Card | Use a high-speed microSD card with a capacity of at least 16GB to store the operating system and Steam Link software. |
| Power Supply | Connect the Raspberry Pi to a power supply with a voltage of 5V and a current of 2.5A or higher. |
| Case | While not mandatory, a case can protect your Raspberry Pi and improve its cooling performance. |
| HDMI Cable | Connect the Raspberry Pi to your TV using an HDMI cable. |
| Controller | Any Bluetooth controller compatible with your PC can be used to control the Steam Link device. |
Once you have all the necessary hardware, you can proceed with the installation process.
Software Installation

1. Download and install the latest version of Raspberry Pi OS from the official website.
2. Insert the microSD card into your computer and format it using the recommended file system (FAT32 or ext4).
3. Use the Raspberry Pi Imager tool to write the Raspberry Pi OS image to the microSD card.
4. Insert the microSD card into the Raspberry Pi and connect it to your TV using the HDMI cable.
5. Power on the Raspberry Pi and follow the on-screen instructions to set up the operating system.
Configuring Steam Link

1. Once the Raspberry Pi OS is installed, connect it to your PC via a wired or wireless network.
2. Open a web browser on your PC and navigate to https://store.steampowered.com/steamlink/set_up/ to access the Steam Link setup page.
3. Sign in to your Steam account and follow the instructions to pair your Raspberry Pi with your PC.
4. After pairing, you’ll need to install the Steam Link app on your PC. Download the app from the official website and follow the installation instructions.
Optimizing Performance
1. To ensure smooth gameplay, you may need to optimize your network settings. Use a wired connection if possible, as it offers better stability and lower latency than a wireless connection.
2. Adjust the video settings on your PC to match your TV’s resolution. This will help prevent any compatibility issues and ensure the best possible streaming quality.
3. If you experience lag or connectivity issues, try adjusting the streaming quality settings on the Steam Link app. Lowering the resolution and frame rate can help improve performance.
Conclusion
Using a Raspberry Pi for Steam Link is a cost-effective and convenient way to stream games from your PC to your TV. By following this comprehensive guide, you should be able to set up and configure your Steam Link device without any issues. Enjoy your gaming experience!


